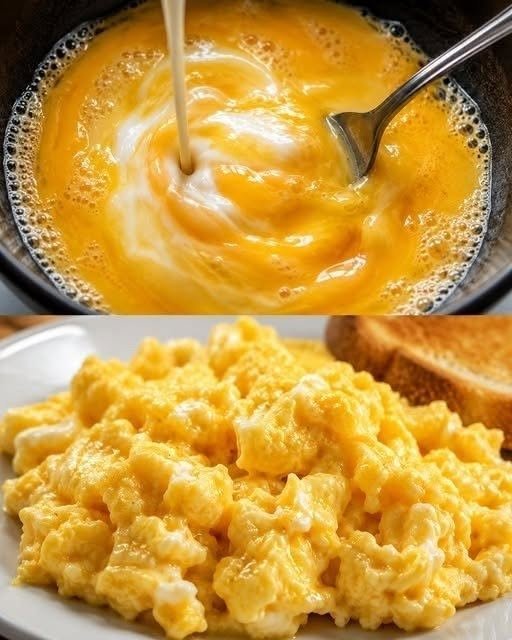
Creamy, tender, and luxuriously soft—perfect scrambled eggs aren’t about fancy tools or rare ingredients. They’re about technique, timing, and a little patience. Follow these chef-backed steps, and you’ll never serve rubbery eggs again.
I remember the first time I had truly perfect scrambled eggs. I was at a diner in a small town, expecting the usual dry, brown-edged breakfast fare. But when the plate arrived, the eggs were pale yellow, soft, and almost custard-like. I took a bite and my eyes widened.
These weren’t scrambled eggs. These were clouds. They were silk. They were everything I never knew eggs could be.
I asked the cook his secret. He shrugged. “Low heat. Patience. Pull them off before they look done.”
That was the moment I realized I’d been making scrambled eggs wrong my entire life. High heat. Constant high-speed stirring. Cooking until they looked “done” in the pan. The result was always dry, rubbery, and in need of ketchup.
Now I know better.
Let me teach you.
🥚 The Core Principles of Perfect Scrambled Eggs
1. Low and Slow Heat = Creamy Texture
High heat toughens egg proteins instantly. Low heat (medium-low to low) allows proteins to coagulate gently, creating tender, velvety curds.
2. Constant Gentle Stirring = Even Cooking
Stirring prevents large, tough curds from forming and ensures no dry patches develop. Think “soft folding,” not “vigorous whisking.”
3. Remove from Heat Early = Residual Heat Finishes the Job
If your eggs look done in the pan, they’re already overcooked. Eggs continue cooking after removal from heat—pull them when they’re still slightly wet.
4. Fat Is Your Friend
Butter adds richness, prevents sticking, and contributes to that luxurious mouthfeel. Don’t skimp.
💡 Chef’s secret: Finish with a pat of cold butter off-heat for extra silkiness.
🛒 Ingredients (Simple, High-Quality)
Ingredient
Why It Matters
3 large eggs, room temperature
Room temp eggs cook more evenly; fresh eggs have firmer whites and richer yolks
1 tbsp unsalted butter (plus extra for finishing)
Unsalted lets you control seasoning; butter adds flavor and creaminess
1–2 tbsp whole milk, cream, or crème fraîche (optional)
Adds richness and slows protein coagulation for extra-soft texture
Pinch of salt (added at the end)
Salt added early can break down proteins and make eggs watery; finish with salt for best texture
Freshly ground black pepper
Added at the end to preserve its bright, aromatic flavor
🌿 Optional upgrades: Fresh chives, dill, or tarragon; a sprinkle of flaky sea salt; a dash of hot sauce
🍳 Step-by-Step Instructions (Cloud-Like Eggs in 5 Minutes)
1. Prep Your Station
Crack eggs into a bowl. Add milk/cream if using.
Whisk gently with a fork until just combined—no need to over-whisk. Small streaks of white are fine.
Have your butter, salt, pepper, and finishing herbs ready.
2. Heat the Pan Low and Slow
Place a non-stick skillet over low to medium-low heat.
Add 1 tbsp butter and let it melt completely—but don’t let it brown.
3. Add Eggs and Stir Gently
Pour in the egg mixture.
Using a silicone spatula or wooden spoon, stir slowly and constantly: push eggs from edges toward center, folding gently.
Don’t rush. This should take 3–5 minutes.
4. Watch for the “Soft Set” Stage
Eggs are ready when they form soft, creamy curds but still look slightly wet and glossy.
They should not be fully set or dry-looking.
5. Remove from Heat Early
Take the pan off the burner when eggs are about 90% done.
Stir in an extra ½ tbsp cold butter (optional but luxurious) and your fresh herbs.
Season with salt and pepper now—not before.
6. Serve Immediately
Transfer to a warm plate right away. Eggs continue cooking from residual heat, so serving fast preserves that perfect texture.
⏱️ Total time: 5–7 minutes. Patience pays off.
🔧 Pro Tips for Foolproof Success
✅ Use the Right Pan
Non-stick is ideal for beginners. Carbon steel or well-seasoned cast iron also work—but require more attention.
✅ Don’t Over-Whisk
Over-whisking incorporates too much air, creating foam that can make eggs dry. Gentle mixing is enough.
✅ Control Your Heat
If eggs start browning or cooking too fast, lift the pan off the burner briefly to cool.
✅ The “Off-Heat” Trick
For extra control, cook eggs using the “French method”: alternate 30 seconds on heat, 30 seconds off, stirring constantly. This gives ultimate control over texture.
✅ Finish with Cold Butter
Stirring in a small pat of cold butter off-heat creates an emulsion that adds incredible richness and shine.
❌ Common Mistakes (And How to Avoid Them)
Mistake
Why It Happens
Fix
High heat
Impatience; wanting eggs fast
Use low heat; trust the process
Over-stirring vigorously
Thinking “more stirring = fluffier”
Stir gently; fold, don’t beat
Cooking until fully set in pan
Fear of undercooked eggs
Remove when still slightly wet
Salting too early
Habit; recipe instructions
Salt at the end for best texture
Using cold eggs
Grabbing straight from fridge
Let eggs sit 10–15 mins at room temp
Crowding the pan
Making too many at once
Cook in batches if needed; eggs need space
🍽️ Serving Suggestions That Shine
Classic: On buttered toast with a sprinkle of chives
Elevated: Fold in smoked salmon, crème fraîche, and dill
Hearty: Top with crispy bacon or breakfast sausage
Vegetarian: Add sautéed spinach, mushrooms, or caramelized onions
Brunch star: Serve alongside fresh fruit, pastries, and mimosas
🥐 Pro move: Warm your plates beforehand—cold plates cool eggs too fast, affecting texture.
❓ FAQs: Your Top Questions Answered
Q: Should I add milk or cream?
see continuation on next page
For Complete Cooking STEPS Please Head On Over To Next Page Or Open button (>)
Doctors Reveal That Eating Eggs in the Morning Causes… A Welcome Change in Health Advice

You can also clean tarnished jewelry perfectly at home

I lost 10 kg in a month without dieting! My slimming soup recipe, day and night
Marinated cucumber salad

Are You Able To Answer These Tricky Questions